08 July 2013

Modern Man's Guide to Sleep Training And Beyond!!!

Your face goes here!
I’ve been inspired (by my wife’s very witty and accurate tutorial) to write a quick note to the dads out there also engaged in “sleep training”.

Disclaimer: I am an average, working dad. I am not an expert on sleep, a doctor or a psychologist. I do, however, have a happy marriage with five small kids who sleep great, take long naps, share rooms and go to bed without issue. There are no books out there that will say this as blunt as I can. This is from modern experience (2007-2013) and conveniently formatted for dads (albeit reviewed and approved for family blog publishing by the beautiful wife! lol). 

Facts:
  1. Sleep training does not suck. What sucks is NOT sleep training. Trust me.
  2. Routine is mission-critical. It’s also not really possible. Learn to roll w/ the punches but keep throwing punches in sleep training. Don’t give up.
  3. Sleep Training (aka CRY IT OUT) will take 3-5 nights if done 100% cold turkey. Follow process below.
  4. This effort is as much about your marriage as it is your kids’ sleep. Pushing through will guarantee you more quality time (even if only a few hours every evening and a couple more on weekend naptime) with your wife.
Rule (There is only one):
  1. Never wake a sleeping baby. 
And for damn good reasons. You will have more time for your marriage, your other children and yourself. After all it is SLEEP training ya’ll. So sleeping baby = mission accomplished (Note Tip #1 below). Think about it. This means fix your schedule accordingly. Postpone EVERYTHING in life (grocery trips, family visits/skypes, your meals, whatever it takes) to accomplish this one-and-only “Rule #1”. 

Process:
  1. Timing is everything. Sleep Training starts at six (6) months.
  2. Environmental Check. Bedroom (aka their nursery at 6 mo.) must have good air flow, be dark and cool. Completely close door during training. Keep a stack of new diapers and wipes near crib. Add substantial WD40 to nursery door to avoid squeaks. Make sure the baby monitor is on (and on the right channel if applicable). Use pacifiers that contrast (in color) with crib bedding/sheets otherwise you’ll be hunting for a pain-in-the-butt pacifier when you’re supposed to get in/out quick during Baby Checks (see 4 below).
  3. Cry Basics. Sleep training aside, babies cry because of the following: temperature (too hot/cold), diaper (poopy/wet), hunger, comfort (ie. missing pacifier). Rule out all those things just before bedtime so you can rest your mind at ease while baby does his/her screaming.
  4. “Drop & Run” technique is what my awesome wife called it in her tutorial. First, don’t ever drop your baby. Second, insert that pacifier. Side note: don’t endlessly debate using a pacifier or not; just use one. Third, run means RUN out of there. DON’T look back! And folks, that’s it.
  5. Baby Checks. Only check on the baby at 10 min intervals. Use a stopwatch (there’s an app for that). Do not go in at 2, 3, 4, 5 – 9 minutes. At 10 minutes, if the baby is still crying, go in, put the pacifier back in and leave (yes, shut the door). ::REPEAT AFTER ANOTHER 10 MIN:: I do it completely silently and try not to make eye contact. My wife uses kind, cutesy phrases/words and makes way too much eye contact. Either way, be consistent every time.
Tips:
  1. Glass Half Full. Do not assume that the baby will freak out. Even if it’s against your nature, go into Sleep Training with a glass half full attitude.
  2. Kick-off. Start this training on a long holiday weekend so you've got a solid 3-4 nights w/o work in the morning (see Tip 4 below, truth).
  3. Night(s) Out. Get your wife out of the house on nights 1 & 2. Not in the driveway w/ a baby monitor on the car dashboard. Tell her to go see movies, visit a friend, go shopping, whatever it takes. I don’t know why or care but the reality is that it’s easier for you to listen to baby cry than her. When baby has finished the first 2-3 screaming fits, give her a call and let her know she can come home any time. There may be 1-2 more but they’ll be exponentially less than the first two.
  4. Monitor. Use one with the lights and turn the volume down. It’ll make the 10 minutes between checks go easier.
  5. Office water-cooler chat. Sleep training is a little like Fight Club. And, ya'll know the rules so "I won't talk about them". Don't talk about it at the office. People will ask out of water-cooler-courtesy. They ordinarily do not care. Just pour yourself an extra coffee, say "It's going great" because in a day or two more it will be.
  6. Sustainment. Babies test your resolve between 6 and 9 months. Stay strong. If you pick them up and they stop crying and look at you all content, silly-happy, s/he is fine. Put the baby down and go back to your business (shut the door, keep environment as noted above). 
  7. Prayer. Adapted from St. John of the Cross’ Prayer for Peace specifically for sleep training… This is a short & sweet one to mix in with some Hail Mary and Our Fathers to get you through 10 min intervals: O blessed Jesus, give my baby and I stillness of soul in You. Let your mighty calmness reign in us. Rule us, O King of Gentleness, King of Peace.

Homemade Laundry Detergent - You can so do this!


 I do a lot of laundry. Three messy kids, 7-month-old twins with reflux, giant dog, regular life...I do a lot of laundry. Right now we're paying about $0.17 per load - I usually do about two loads a day, so I'm paying about $130 a year for detergent. I also add oxygen cleaner to each load, so that's another $70 a year, plus dryer sheets or softeners and stain treaters, so I estimate I pay about $300 a year for "laundry chemicals."

Not bad, but I have to buy food, too, you know?

I started researching making my own laundry detergent, but it felt like I had to do a lot of searching for some of the ingredients, and I'm lazy. So I put it off. UNTIL TODAY.

I use powdered detergent. It cleans and rinses better and you have the option to put some back easily if you "over-scoop." I hate wasting detergent. I have to buy food, too! So I meandered around the internet for like a year and finally decided to create my own. I just sort of took the "main ingredients" from everyone else's recipes and made one that included everything. The optional items that I added to mine were baking soda (odor control) and epsom salts (for softening - seeya later, softeners!)

The bigger one in the laundry aisle - $3.00 at Walmart.

$3.00 at Walmart


So if you really don't feel like adding those two, just go with what you see from here. 

I used an entire box of Borax - the smaller of the two you see in this picture. $3.98 at Walmart.


One bar of this. $1.50 at Walmart

40 ounces (or so) of this.  $10 for 96oz at Walmart.

One box of this. $3.30 at Walmart.

Two bars of this. $.99 at Walmart. But if you're not going to use baking soda and epsom salts, just use one. I'm actually not sure if they sell this across the entire country, as the website on the back is a Mexican domain. We Texas folk are lucky like that. If you can't find this, any bar of laundry soap will work. A second bar of Fels Naptha would be fine, too. 


Here's what you do: 

1) Grate your soap bars with a cheese grater. It's just soap. You use soap to wash your cheese grater, so it's all good. Just rinse it well when you're done. 

2) Puree your grated soap in your food processer. You want it itty bitty and grainy. I added a few tablespoons of the oxy cleaner to my batches of soap in the food processor to help it dry up a little and get powdery. This was SUPER helpful. 

3) Find a big tub and dump your processed soap, Borax, Oxy cleaner and washing soda in there all together and stir it up well. If you're using the baking soda and epsom salts as well, throw that in too. Mix it up like crazy and you're done! You can also add 30-40 drops of essential oils, but whatevs. I wasn't that motivated. I don't necessarily need everyone to smell delicious. I just don't want them to stink.

One tablespoon for regular loads, two tablespoons for large loads! I'm storing mine in old formula containers because they have a handy scoop and are manageable sizes that I can sit on my laundry table. 


And yeah, I'm saving a ton of money. Fifty bucks for a year's worth of detergent? That's $250 for the bank! 


"Hey Mom, remember when we were so poor you made laundry soap in the kitchen?" 

"Hey kids, remember when I taught you to stick it to the corporate man?"

Homemade detergent. It works on so many levels.

A little picture update.

Oh Heavens. I guess Andrew REALLY wants me to blog more, because I found a handy little blogger button on my bookmark bar, just begging me to post something. Well, that or Google is really into making life easier for me. Here are a bunch of pictures from the past few weeks. The top picture is Lucy's last day of Kindergarten, because I have no idea if I've posted it yet.


Uncle John and Mo


Fishing with Daddy

Playing with Uncle John


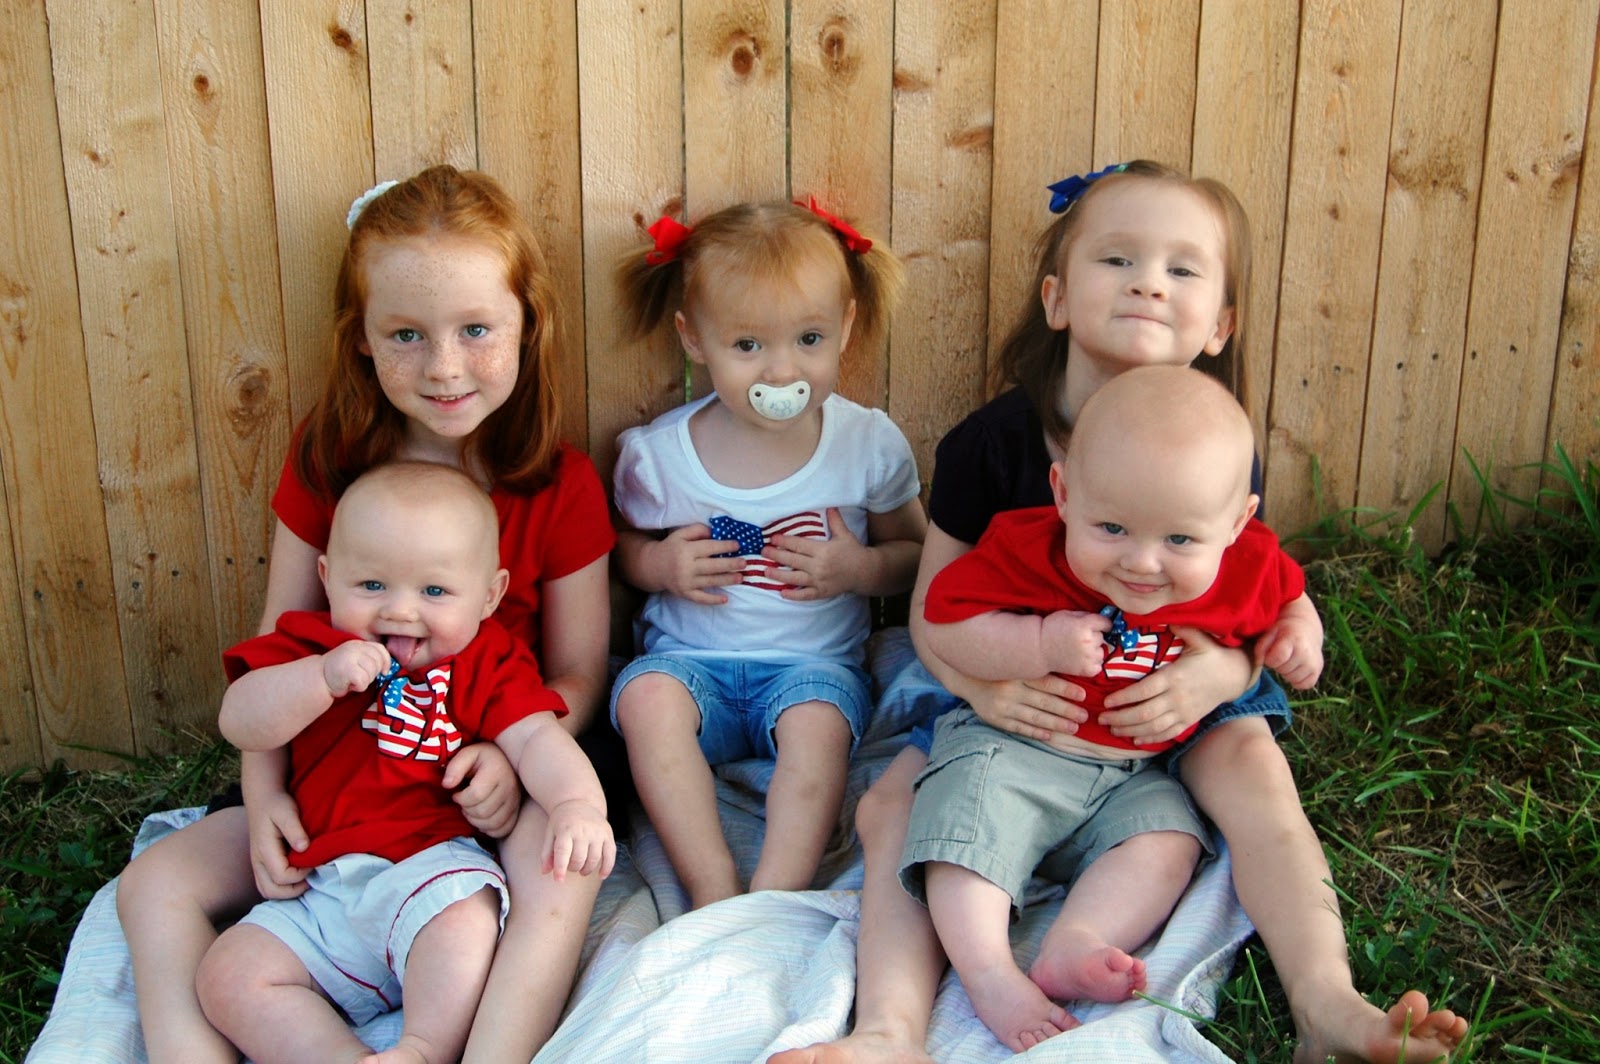
Five Little Firecrackers! I have no idea which baby is which in these. Maybe Miles on the left? 


Miles on the left, Max on the right? 


Daddy Grilling on the 4th of July! 

07 July 2013

The Zombie Parents' Guide to Sleep Training

Disclaimer: I am not an expert on sleep. I am not a doctor and I am not a psychologist. I do, however, have five small kids who sleep great, take long naps, share rooms and go to bed without issue. There are many books out there that will say this better than I can. This is a sort of compilation of everything I've learned over the past 7 years.


You're probably reading this for one of three reasons. 1) You're tired and you want that little stinker to sleep already! 2) You read everything I write because you're my mother. 3) You've exhausted your Facebook feed. If you're here for sleep help, read on!

So, sleep training. It sounds so mean. Who on earth would make a helpless child cry when they could just rock them to sleep? I know. I thought that too, once.

Why Sleep Train? Kids thrive on routine. My three eldest girls eat the same thing for breakfast, watch the same movie every morning, eat the same thing for lunch, say the same prayers with Daddy, sing the same songs in the car. Bedtime routines are important. For a baby under a year old, consistency is absolutely key. Giving them another piece for their routine is such a service to them! They need to know that when they get in bed, they're going to see the same results every time they wake. When it's dark, they sleep and when it's light, they can get up. They nap for at least an hour, and they settle down and close their eyes when it's time for sleep. They don't rock to sleep in one of five different places, they don't fall asleep in two different sets of arms, they don't hear a different lullaby every night. What's fantastic about sleep training is that while it gives Baby freedom to understand bedtime and get a good night's sleep, it also gives Mama and Daddy the freedom to have time together at night and to live something of a normal life for just a few hours each day. Being able to leave Baby with a sitter long enough to have dinner and catch up without sweeping up Puffs and pacifiers is exactly what will recharge you and get you through these tough early years. How much nicer would those dates be if you knew that your poor sitter wasn't trying desperately to get Baby to sleep?

Sleep is so, so, so important. Baby needs it to keep her body strong and healthy and to hit milestones on time. You need that time in the evening. You need that stretch of sleep at night. You need that nap during the day. A happy, well-rested child is pleasant to be around and brings joy to the home. A child who has slept in her bed all night is one that you miss and greet warmly on the other side. It's really hard to find the patience during the day (and in the middle of the night!) when you've been dealing with a cranky, overtired kid without respite.

Our own breaking point came early with our firstborn, as she was a terrible sleeper who refused to sleep in her crib for more than two hours at a time. It took months for us to finally buckle down and just do it already. It's hard, no doubt. Some parents don't hit the desperation stage until 18 months, 2 years, etc. Some don't reach that point until their second child. But I can assure you, that point comes at some point for every parent. Many parents go with, "Well, they'll sleep eventually, right?" Eventually? Wouldn't you like them to sleep by, say, next weekend?

When can I start sleep training? Six months. There is some margin on either side, but generally six months is a good age. They can understand that you'll come back, you know them pretty well and they're big enough to get the job done and sleep through. Before six months, you really need to be attending to their every whimper and cry. There are steps to raising happy, secure kids, and making sure that your young baby feels absolutely safe and happy is the key to successful sleep.

Is this about cry-it-out training? Yes.

How long does it take? Anywhere from 3 nights to 3 weeks, but in my experience, 3 nights is about it. If it takes longer than about 3 or 4 nights, you're probably missing something in the consistency. Babies are smart. If you're 100% consistent, they'll get the hang of it very quickly.

What can I do before 6 months to prepare for sleep later? 
  • Establish a bed-time routine and make bedtime nice and early. Babies need a LOT of sleep. A 6:30 bedtime is completely normal.
  • Put them down awake but drowsy. 
  • Do and say the same things every time. "Time for sleep! I love you! Goodnight!" 
  • Dark room, noise machine, closed door. Every time! We try to keep the bedroom side of the house completely dark with the exception of the cracked closet door for the girls. It's important that the babies go to sleep in the same environment in which they'll wake later. Can you imagine falling asleep at the noisy dining room table and waking up in complete, quiet darkness an hour later? You'd think you'd been kidnapped. 
  • Keep the room cool and the air circulating. We keep a fan on in the nursery and try to keep it nice and cool. Once our kids start to heat up, the bad dreams and waking begin. 
In my experience, the best thing you can do before 6 months is know that it's a short time period. It feels long and everyone's fried, but it really will be just a blip before long. 

My kid is 6 months old. Now what? 

Okay, here's where it gets fun. (No, really! You're almost there!) No one likes to hear their kid cry, but you can do this. Most importantly, your KID can do this. If you haven't tried a "drop them and run" approach to sleep yet, you might be shocked to find that your baby just lies there for a minute and goes right to sleep. Our first baby was a nightmare. Our second popped right into her crib at 6 months and loved her crib from that first night. Never a tear. Our third yelled for about 20 minutes and figured she was better off unsupervised anyway. Our fourth cried for 45 minutes the first night and about 20 minutes the second, with a few night waking issues. Our fifth was a night-waking-banshee who still has a night here and there. Our fourth and fifth are identical twins who sleep in the same room, so that took a little longer than normal. It just depends on the kid. (I should note that they are currently 7 months old and we're still dealing with a few refreshers here and there.) Here we go. 

The Process

1) Choose a block of nights where you can stand to lose a little sleep. We usually try to plan out a Thurs/Fri/Sat/Sun over a holiday weekend or something similar. 

2) Light your hallway with red night lights. If you do need to get up, the red light isn't as jarring and will help you get back to sleep sooner when you return to bed. Also, use a little Pam or WD-40 on the nursery door and make sure you can get in and out without noise. They can hear that tiny squeak above the noise machine - I have no idea how. 

3) You need a noise machine. Make it nice and loud - you'll probably have to listen to it all night, so pick a swooshy sound. The heartbeat noise will give you nightmares. Make sure your monitor and your noise machine are on opposite sides of the room, or your noise machine will drown out the baby and  you won't be able to hear the baby noise over the swoosh. 

4) Pick the parent who can deal with the crying better. They can take the first shift. If you're at risk of running in and scooping Junior out of his crib, this would be a good night to catch a movie or visit a friend. 

5) Put baby down about 3 to 4 hours after he wakes up from his latest nap. This is a good window. You want to get him into bed before you start seeing the yawning or eye-rubbing. 

6) Once baby has been fed and changed, pop the paci in, turn off the light, hand him his lovey and put him in the crib. Say, "Time for sleep! I love you!" Walk out and close the door. 

7) Wait ten minutes. This may be the longest ten minutes of your life, or he may just roll over and go right to sleep. 

8) If Baby is still roaring at the ten minute mark, walk in long enough to hand him his paci, pull him back to the middle of his crib and say, "Time for sleep! I love you!" Walk out, close the door. Doing the exact same thing every time is key. 

9) If Baby refuses to calm down, I almost always go in every ten minutes. After two or three ten-minute spurts, they're usually winding down and I space more time between the paci-visits. Some sleep experts call this "extinction." 

10) If you're worried that something else is wrong, consider Baby's mood when you put her down. She was probably perfectly happy then, right? If you're really concerned, pick her up for a minute. If she immediately stops crying, it's probably pretty clear that she's crying for one reason and one reason only, right? Gotcha, Mama! 

11) If, by some chance, Baby makes it to the 45-minute mark and is still very upset, this is a good time to consider what her cries sound like at this point. A 6-to-9 month-old baby doesn't really understand manipulation and will usually just cry because they want Mama and Daddy to come back in. Past the younger baby age, you're much more likely to hear your little sweetie sounding pretty mad and offended in there!  Assuming you're dealing with a younger baby, I would pick her up, console her and distract her for a little bit. You can always try again later. If Baby is quieting for longer intervals I usually leave them, but I try not to let them full-out scream for more than an hour. I can handle crying for awhile, but my mama instincts usually tell me to go in and cuddle them at this point. They've done their time and are ready for some reassurance. Reaching the one-hour point is where most parents crack and decide that their baby just can't handle "Cry It Out" or "CIO." Try again tomorrow. And the next night. And the next. I can promise that Baby will start to understand what's going on. 

Night Wakings - I treat night wakings just like bedtime, with the exception of checking diapers. If Baby is dry, I replace the paci and say, "Time for sleep! I love you!" and walk out. The twins aren't really happy about us just walking back out when they wake up at night, but they're starting to get the hang of it now.

Should I do naps first, nights first or both at once? Both at once. I usually start with a nap only because I'm here during the day and Baby can get a little practice in before it's really important. And, if naptime just doesn't happen because Baby can't quite figure it all out, I have a better guarantee that he's probably going to crack and go to sleep that night.As far as naps go, Baby needs to sleep for at least an hour per nap. If he doesn't do an hour, he hasn't had a nap. You can use short naps to "practice" his sleep training, which is what I usually do. If the boys fall asleep in the car, it doesn't count. I keep them up for an hour and then put them down for a real nap. If I put them down in their cribs and one of them "wakes up" after 20 minutes of sleep, I scratch it from the board and assume he needs to "start over."

What about pacifiers? Honestly, this is a great time to wean from the pacifier. Might as well, right? If, however, you're just not up for two challenges at once, that's fine. Do a night or two and figure out how many times you're going in to replace the paci. If it's more than you can handle, ditch the paci. My firstborn was a nightmare with the paci. She needed help finding that thing constantly. Our four since her used to it to fall asleep initially and then self-soothed in other ways throughout the night. If I had another like Lucy who was constantly waking for the paci, I'd take it away cold-turkey and be done with it. Hindsight and all that...

But I just feel so bad!  NEVER BE APOLOGETIC. If you walk in and start whimpering, "I know baby...Mama's so sorry! I know this is horrible!" you're not just confusing the poor kid. You're apologizing for doing something that is in place for their own good. Would you apologize for pulling her out of the way of an oncoming car? Would you apologize for teaching her to be wary of strangers? No, sir! Teaching Baby to sleep is incredibly beneficial to their emotional well-being and their physical health. This should be a positive and cheerful time. Even if your nerves are frayed and you're really doubting this is going to to work, give Baby a happy voice and a little pat and walk right back out. You will feel like a champ when it's all over.

You can do this, friends. On the other side, your happy, confident, fantastic Baby will be waiting for you with a big high five!

04 July 2013

Scrabble-Inspired Wall Art - a tutorial!


So I am a huge Scrabble fan. Like huge. Andrew won't play with me anymore, so I'm pretty much up a creek as far as actual game-play. I figured it would be a fantastic form of "nobody wants to play with me" punishment to put a big Scrabble board on our wall! 

I started searching around for some kind of inspiration about three years ago and came up empty. I wasn't really in the mood for creating something sight-unseen and we were still looking for our forever home, so I put it on hold. Who wants to hang a million little tiles on the wall if you're going to do it again in 6 months? Uh, nobody. 

So this spring I started looking again. I found ONE tutorial online throughout the entire internet. Bananas. Do people really not want Scrabble art?!?! This tutorial was good, but there were a few things that we needed to change in the execution. 

If you look at a Scrabble tile closely, the letters do not take up the entire tile, nor is the tile square. We were actually attempting to make the tiles square at first, and with a twist of "that's not what I thought I bought" fate, we lucked out and had the perfect size. 

I'm not posting a lot of pictures for this because it's REALLY SIMPLE.  


What you'll need: 

Wood
A saw (or a nice man at Lowes to do some cutting for you. Our Lowes does cuts for $.25 per cut, first cut free. Not bad if you're not a saw-owning individual.) 
Sandpaper
Mod Podge
A paintbrush
2 inch vinyl letters
1/2 inch vinyl numbers 
Itty bitty hangers (I found mine in the clock-making section of Hobby Lobby)
One pan of brownies (Two if you have more than four names in your family)


Here's how it goes: 

1) Arrange your letters. This is the most difficult part. We did it in Excel so that we could arrange and re-arrange easily. After it was totally done, we took a screen shot and saved it to our desktop, as we knew we'd be referencing it many times before the art was up on the wall. You can see we made a final tweak in the arrangement when we started hanging it. It turned out that making the words branch out a little more made it look a little more natural and easy on the eyes. 


2) Pick out your wood. A 1X4 is your best bet. Nice and light. Andrew went to Lowes to find the perfect piece and he came home with a gorgeous piece of poplar. It was an expensive piece of wood, but when you consider how large the entire thing will be on your wall, $16 for wood is decent. One of the things I wanted to change about the tutorial above was that I didn't want to be whitewashing or painting anything. Scrabble pieces aren't whitewashed, so I wanted something that was the right shade right off the bat. We have a big family, so whitewashing that much wood sounded like a nightmare, anyway. The poplar was the perfect color AND the wood itself was a lot more forgiving with the saw, so there was no splintering. I made a second set for someone later and made the mistake of using a white pine. The poplar was much softer, and I think that helped a lot.

3) Measure and cut your wood. We thought we were doing a 4 inch by 4 inch cut, and when Andrew was done cutting I pretty much died a million deaths because his 4 inch cuts didn't come out to a square piece of wood. Huh?! It turns out that Andrew bought a 1 x 3.5. It ALSO turns out that a Scrabble tile is not square. Happy twist of fate. 

4) Stick on the stickers. Easy peasy. Pull your Scrabble game out of the hall closet to reference the numbers that should be on each tile. Be aware that most of the letters are worth one point and most packets of vinyl letters/numbers don't have very many 1's. You may end up with several packets of 1/2 inch numbers/letters left over, but seriously? Who cares?! It looks amazing. 

5) Mod podge! I just did the face of each tile. Don't be a hero! 

6) Convince your husband to screw on a million itty bitty hangers. This is actually easier than it looks, unless he has severe carpal tunnel. Start mixing up brownies now. 

7) Convince your husband to hang the tiles. You're going to want to have a pan of brownies handy to calm his nerves once he finishes. He says, "Space them half an inch apart." He did it using a straight edge and a pencil and then went back and erased the line when they were all hung. Maybe two pans of brownies. It was harrowing. But worth the effort! 

I need to go fix my "D." What IS that?! Crookedy crookedy!


These are just an example of how big this is. Our living/dining room area is pretty big and this piece worked really well on our "big empty wall." We needed something that would be a good focal piece that sort of make a bang when you walked around the corner, and our Scrabble art really does the trick! 


Okay, friends. Go make something awesome!